Recently, we’ve received a lot of great requests for new features that we have been hard at work bringing to you. Today we can finally announce all that we have been working on! There’s a great mix of improvements and new features that will continue to give you more control over your web push campaigns and make your overall experience easier and more enjoyable.
This round of updates includes an awesome new template feature, enhancements to triggered campaigns, welcome notifications, and opt-in prompts, as well as some new analytics options. There’s a lot to get to so let’s dive in!
When we first introduced pre-made templates you were limited to templates that we created for you. While this is still a great feature, especially for new users, it left out one component: You! You now have the ability to make your own templates from any segment that you create. This is an incredibly useful feature for those of you who run multiple websites.

As template owner, you have full control over permissions related to the segments that you set as templates. To save a segment as a template, simply select the segment (or segments) that you wish to use and hit the new ‘Save as Template’ button from the Options drop-down menu.
Once saved, navigate to the Templates tab to see your list of templates. This screen will show you all of the templates that you have access to. It has also been updated to show who created each template, as well as each template’s permissions.

You have a few options for your template permissions:

You can also decide if the template should be locked or unlocked. If locked, only you (as owner) will be able to tweak the template. When unlocked, anyone with access to the template will be able to edit it.
Access these options by selecting a template and clicking ‘Change Permission’ from the Options drop-down menu. You also have the option to delete the template.
We hope that this new feature will come in handy and that you enjoy the ease of creating a segment once and using it at various sites that you manage. Support for campaign templates will be coming soon as well.
Another great way to save time if you have several websites that you are managing web push for is to copy and paste campaigns across your various sites. You’ve already got the ability to do that for manual campaigns, and now you can also do it for your triggered campaigns!

All you need to do is head to your list of triggered campaigns, select the ones you wish to copy, and select ‘Copy Campaign(s)’ from the Options menu. Head to any other website you manage, go to Triggered Notifications, and this time hit ‘Paste Campaign(s).’ That’s it!
Action buttons have arrived for welcome notifications! Your welcome notification is incredibly important, as it serves as your first impression for each new subscriber. You can now leverage that power even more by adding up to two action buttons encouraging the subscriber to take immediate action.

Add your welcome action buttons the same way you add action buttons for your manual and triggered campaigns. Depending on your industry you can decide what will work best for these action buttons. Maybe that is to learn more about your company, shop your products, download a case study, or sign up for a newsletter.
We highly recommend you take advantage of these buttons. Once added, be sure to check your analytics and see if they have an impact on your CTR.
There are a few new view options you have when looking at your dashboard overview! You can now view your total subscriber count as well as your conversion count. As with all other metrics, you can adjust the time period you would like to analyze and can view results for one website or for all of the websites you manage.

This is a great way to see your growth over time- either all-time or during a specified period of time (saying during a big sales event or during the last quarter). Adjust the parameters and download your results for easy sharing with clients, stakeholders, or other team members.
The same goes for conversions. There is a new Campaign Conversions view that you can select for seeing how many conversions you logged during a specific period of time. Keep in mind that conversions do not just have to be for ecommerce purchases. A conversion could be something like form submitted or PDF downloaded. For more help setting this up, be sure to read our conversion tracking documentation.
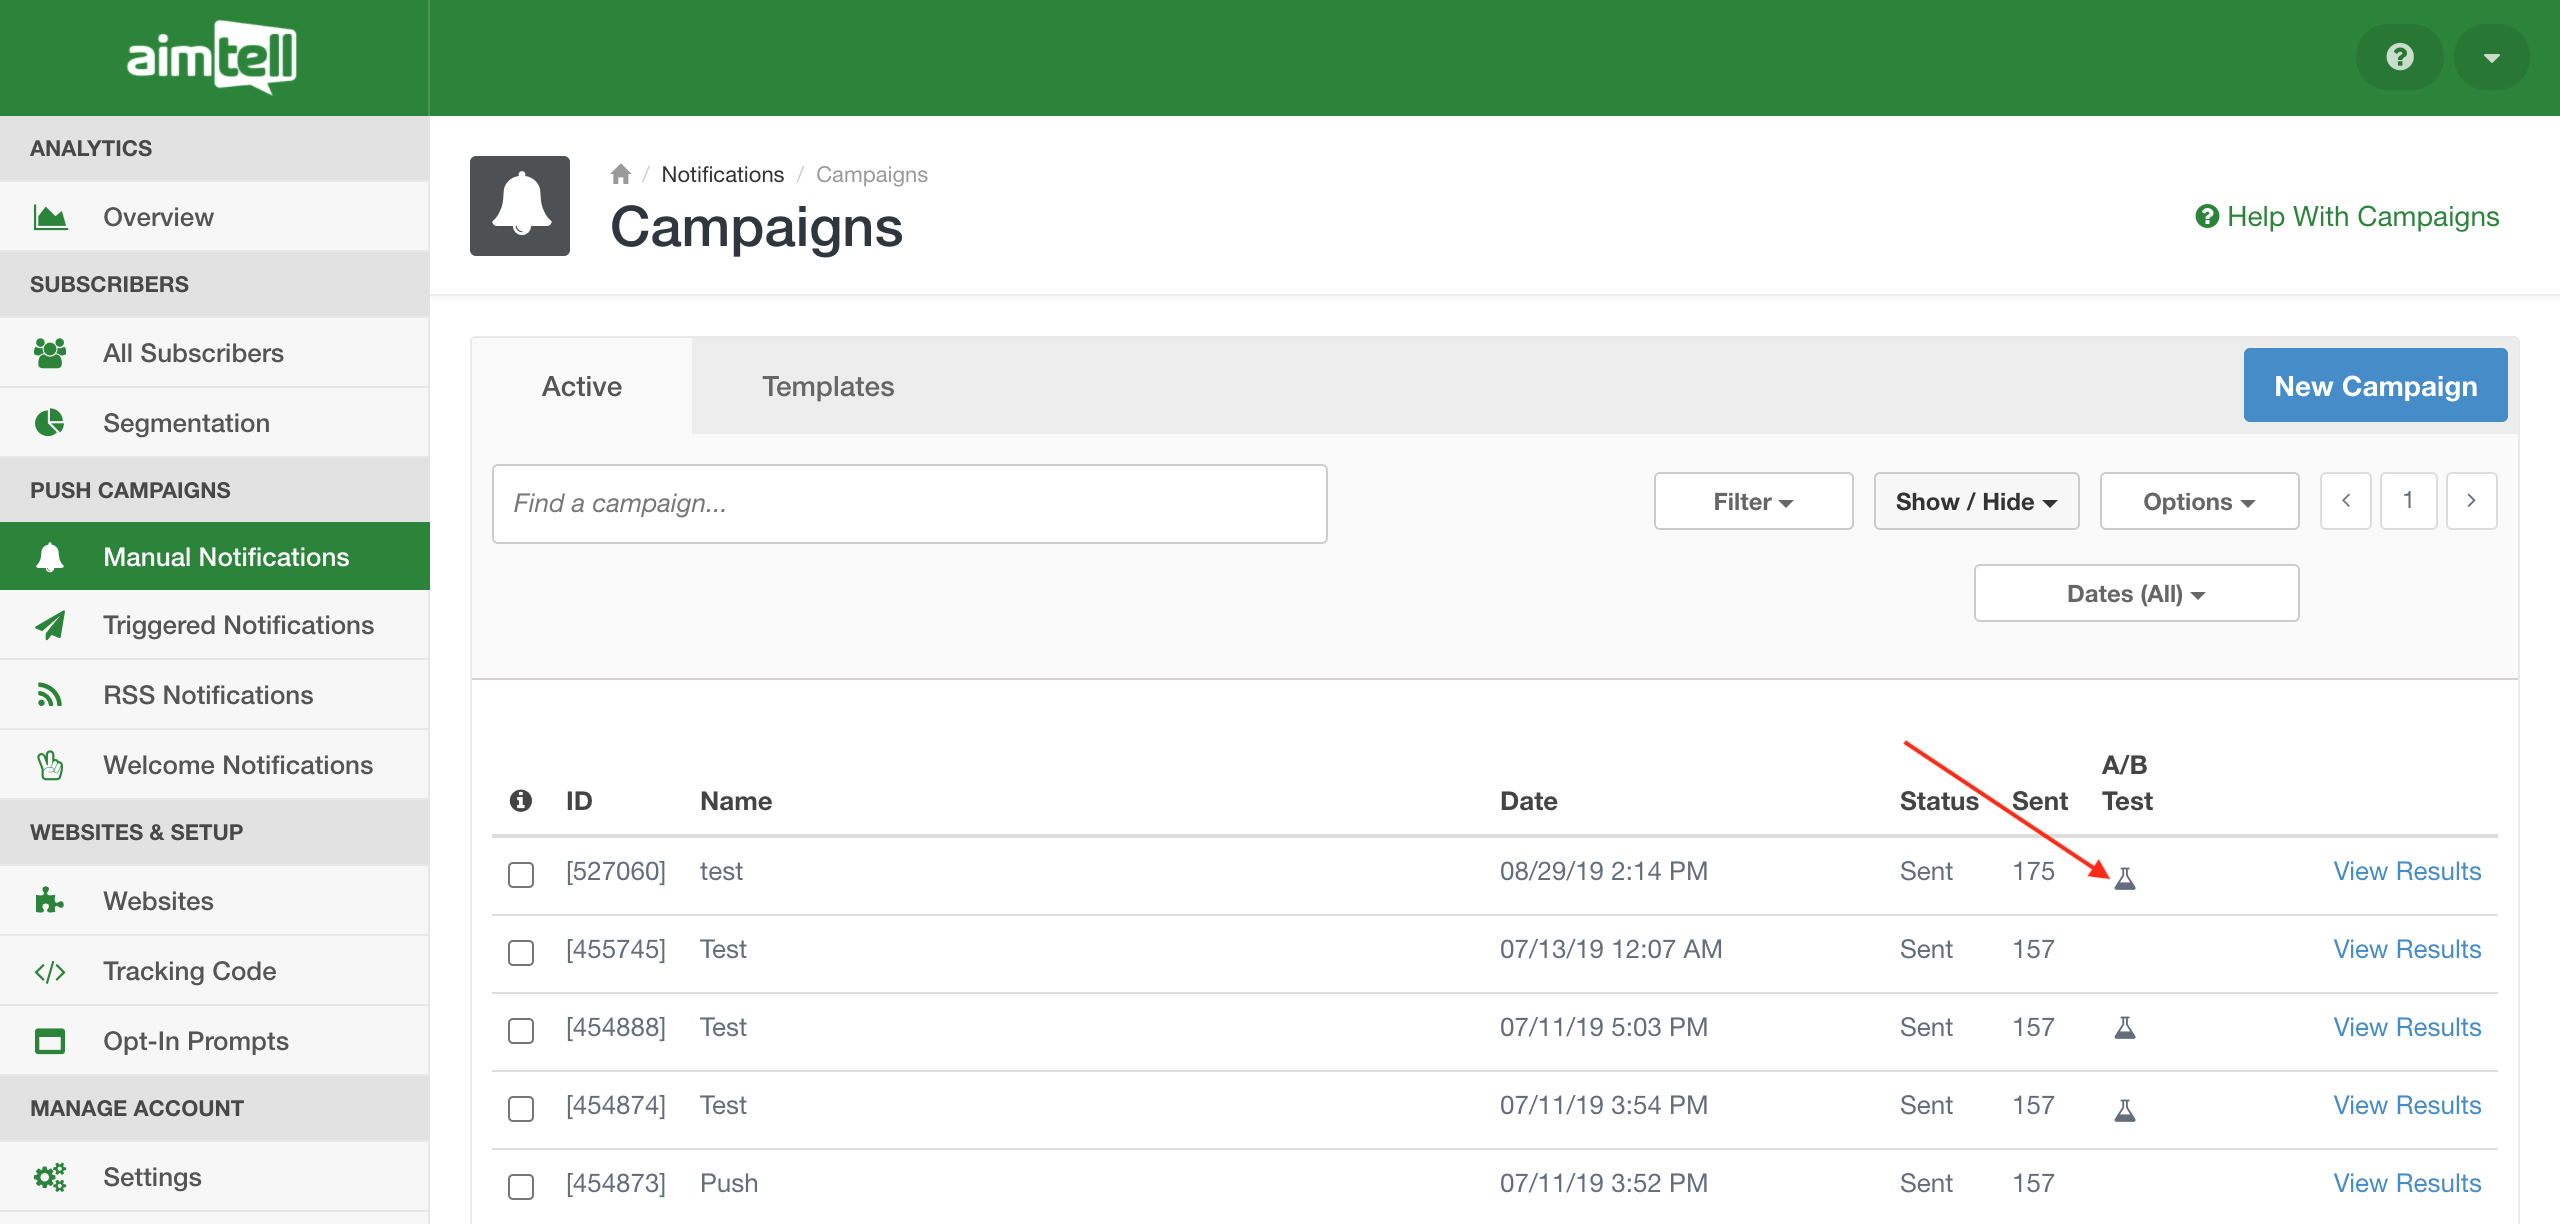
Have you ever wanted an easy way to sort your campaigns by their conversion value? Now you can! We’ve added a handy ‘Conversions Value’ column to your campaign overview pages for manual and triggered campaigns (conversion tracking for your RSS campaigns is coming soon!) This will help you to quickly and easily identify your most profitable campaigns.

If you don’t see this column when looking at your campaigns, make sure it is selected when you click the Show/Hide menu. Keep in mind that you can always export your results by selecting ‘Download Campaigns’ from the Options menu.
We’ve also made some enhancements to our opt-in prompts. Most significant is our new option for testing your prompt conditions. As you already know, you have a lot of options for when and how to show your opt-in prompts. This can include which pages to show them on, when to display the prompt (such as after a delay or percentage scroll), which browsers or device types, and so on.
If you have a lot of unique prompts and logic, a great way to figure out which prompt will display on which page is to use our new testing feature!

Head to Opt-In Prompts in the sidebar and then click the Page-Specific Logic tab. You’ll see the new Test URL button which will allow you to input any URL you want. Hit ‘Test’ and your site logic will be tested and the opt-in prompt that will display on that particular page will flash green on the list.
This is a great way to make sure that you have set things up correctly and are displaying prompts at your site the way you intend to. If you test a URL and a different prompt displays than what you want, adjust the logic and test again. Keep in mind that you might need to adjust the priority or add a wildcard (*) to target the correct URL.
You can learn more about setting up opt-in prompt conditions in our opt-in prompt page or browser-specific logic documentation.
You’ve also now got the ability to completely disable your opt-in prompt. To do so, head to the Site-Wide tab of the opt-in prompt page and you will see the new option in the Show Prompt dropdown.
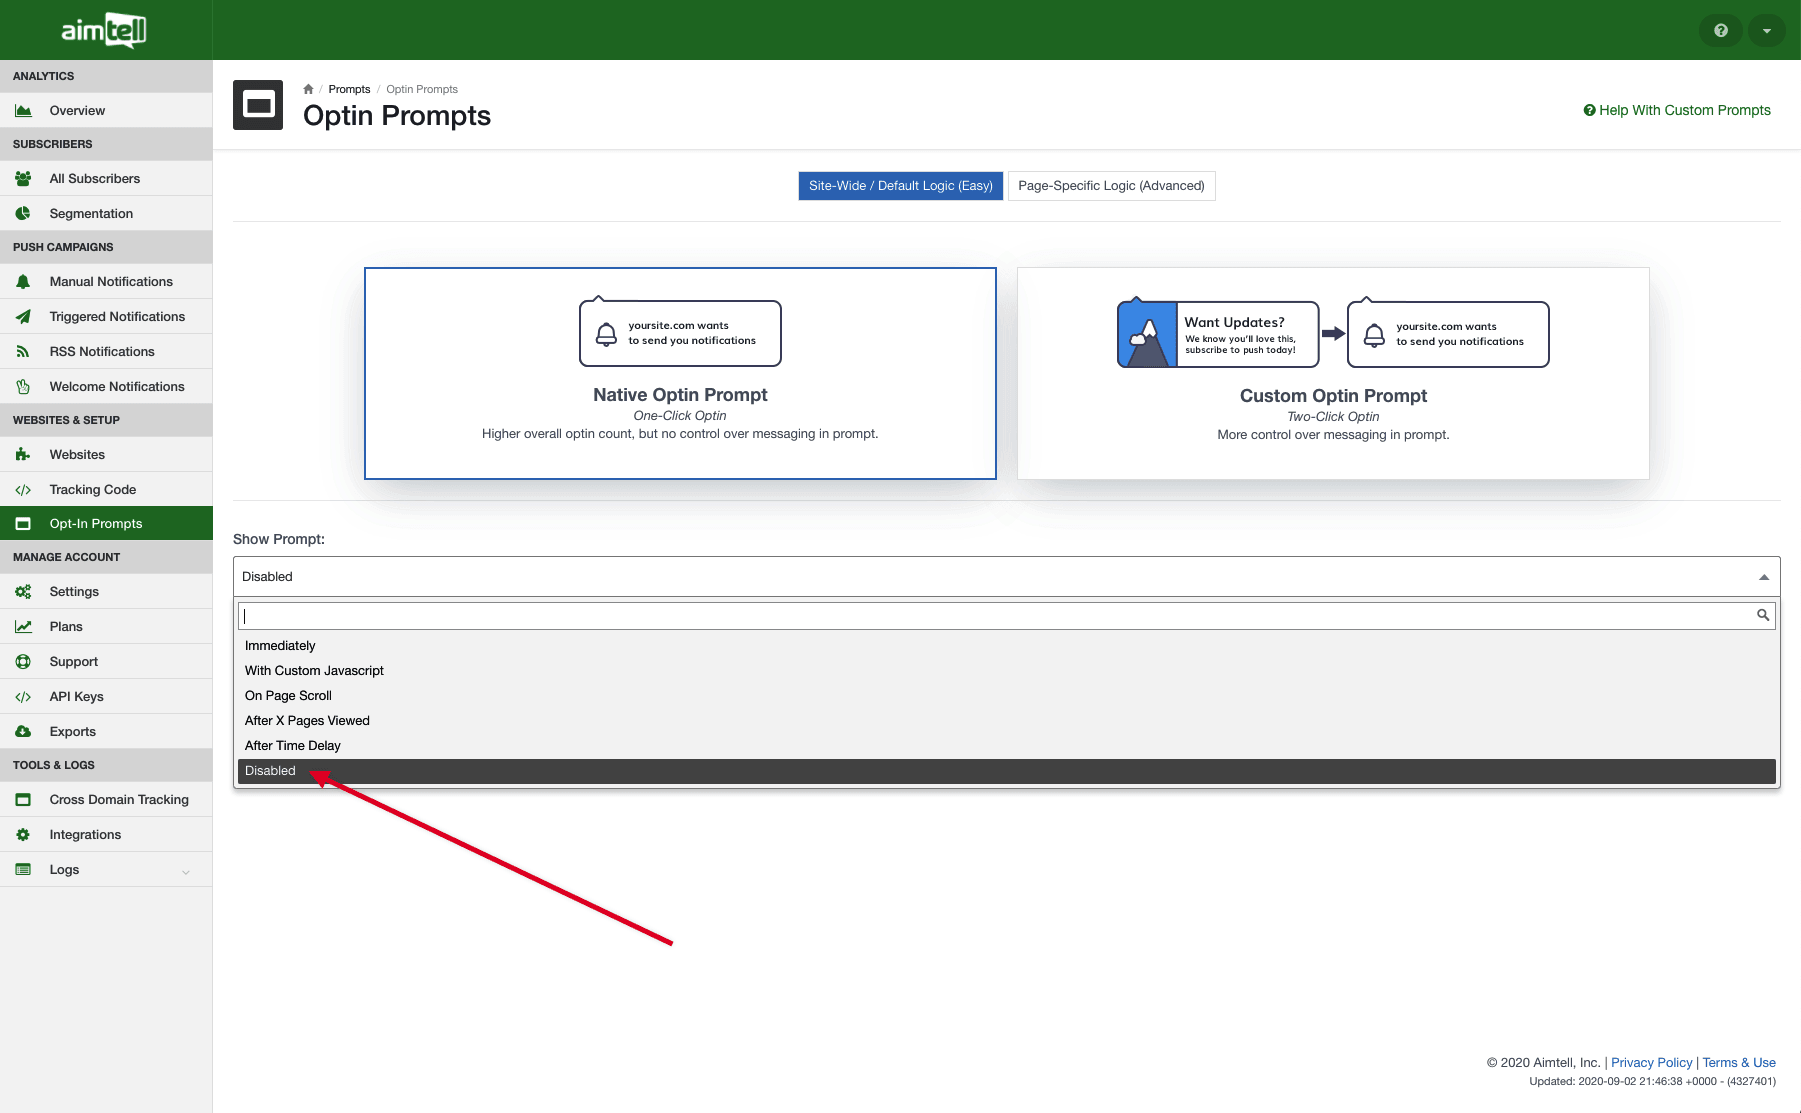 If for whatever reason you do not want to add any new subscribers to your list or wish to disable your prompt for testing purposes, this disable option gives you an easy way to do so. Just remember to change this option when you wish to return to collecting new subscribers.
Those are the main updates to look out for, but here are some additional smaller updates to be aware of as well:
We hope you enjoy these new updates. Everything is live now so be sure to check them out in the dashboard. As always, we appreciate all of your suggestions for new features so keep them coming! If you have any questions please reach out to us and someone from our team will be happy to assist you.
For those of you who are new to web push and want to get started, you can start your free trial with Aimtell or learn more about web push by reading our Beginner’s Guide.