It’s been a while since we first introduced custom opt-in prompts, and now we are excited to reveal some cool new features you are able to use! In addition to custom prompt options we have some other features we have been working on as well that we want to share with you all. As always, our goal is to give you even more control (and make things easier) with all aspects of your web push notifications.
Not a fan of the original opt-in prompt? No problem! You now have the option to choose between the original and an updated prompt that will display in the middle of a user’s screen.

The above image shows you what both prompts look like. As always, you can choose what the text is and pick the colors you want for the text and buttons. The new prompt also allows you to choose a custom icon. If you don’t select anything your site icon will be used instead. Use this custom prompt to give your users a preview of what they can expect from your web push campaigns so that they are more likely to opt in.
By default your opt-in prompt will trigger automatically when a person lands at your website. While the benefit of this is that your prompt will be shown to anyone who visits your website, the downside is that you don’t have any control over the timing. Our prompt management features allow you to change that, and now you have even more trigger conditions to choose from.
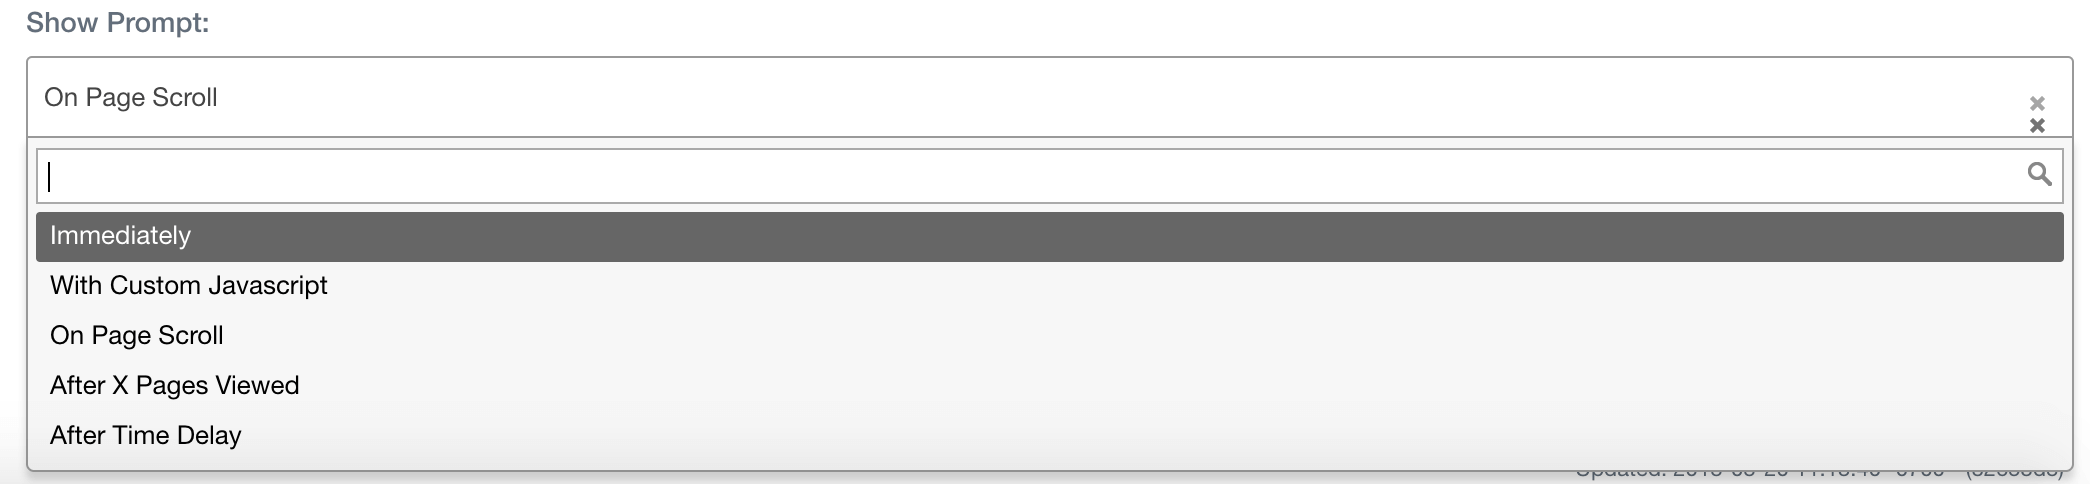
You can now choose to trigger your prompt based on factors such as once a person has scrolled a certain percentage of the page, after they have viewed a certain number of pages at your site, or after a certain amount of time. Simply select the option you want and a bar will pop up below to input the corresponding numerical value (if needed).

The above example requires you to input a number of seconds for the delay. The bottom bar will update accordingly based on the prompt condition you choose. This makes it incredibly easily for you to manage when your audience will view your opt-in prompt. Keep in mind these options are available for both the native prompt and any custom prompts you may use.
We felt that our old system for prompt management was a little difficult to use, so we have totally revamped it to make it much easier. Head to your dashboard and click on ‘Opt-In Prompts’ to view the new tool. From here you can choose your prompt management conditions as well as create any new opt-in prompts that you want.
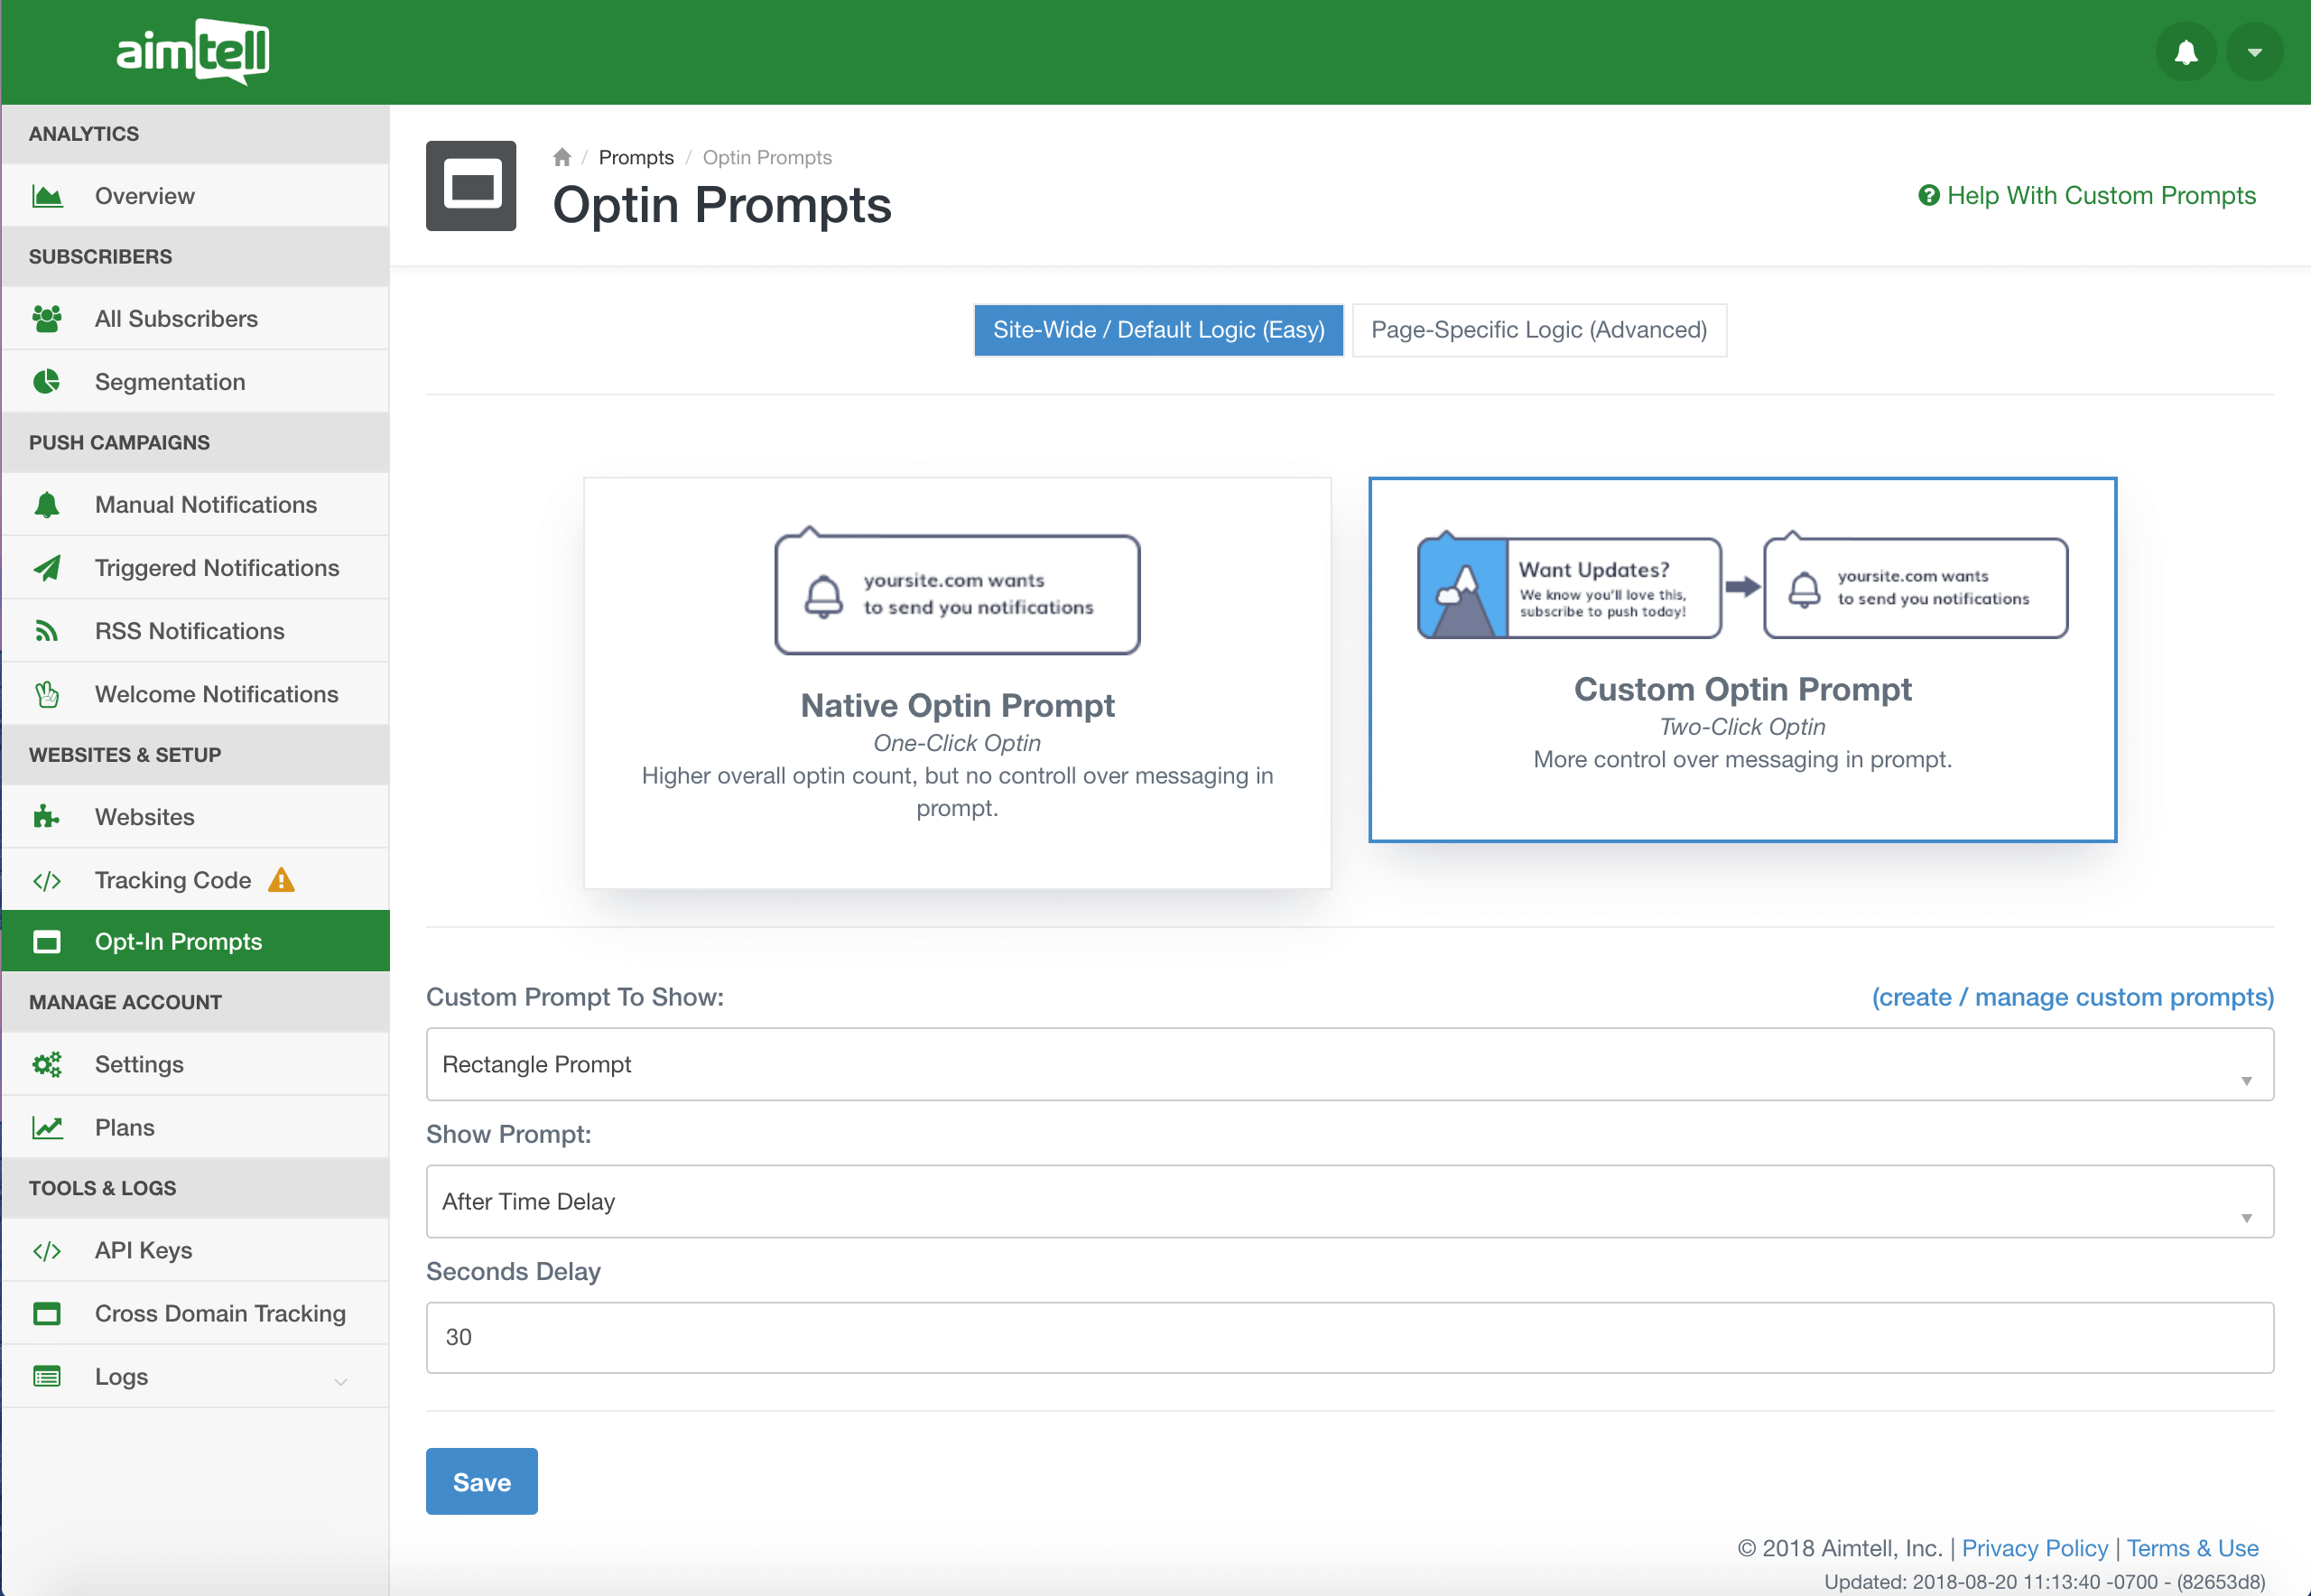 The updated opt-in prompt management tool
Hit ‘create / manage custom prompts’ to create a new prompt. The default site-wide logic will be selected automatically, but if you want to create page-specific logic you can do so simply by clicking that option at the top of the screen. Everything is much easier to navigate and set up now, both for native and custom prompts.
If you’ve headed to your dashboard recently then you’ll realize we didn’t just stop at updating the prompt management tool! Instead, we did a logical update to our entire dashboard in order to make the navigation much easier. Our sidebar is now better organized so that you can easily find whatever it is you need.

You can see that most everything looks the same, but items are now better grouped together. You should find that this makes things even quicker and easier for you when setting up your websites, segments, and campaigns.
Last but not least, we have added the optional ‘Event Value’ section to our triggered notifications. This allows you to have more control over when a triggered notification is sent. For example, if you want to send a triggered notification as a follow up after a user has clicked a particular notification, you now have the ability to do so! Simply fill out the ‘Event Value’ part of the notification set up screen and you are good to go.

That’s it for now! All of these new features are live and ready for you to start using. Have you been waiting to explore your options when it comes to custom opt-in prompts? With this update it is now easier than ever, so give it a try and see how it impacts your opt-in rates!
Are there any other updates you want to see here at Aimtell? Let us know by sending us a message. If you are looking to get started with our web push notifications, head over here to start your 14-day free trial.