Driving users to your blog can be tough. Really tough.
If you are like most, you probably spend quite a bit of time and effort perfecting your posts. Once posted, you blast an email newsletter and update your social media in the hopes of bringing back previous visitors and boosting traffic.
But what if I told you that you were leaving money on the table?
Over the past couple years a brand new marketing re-engagement channel has been rolling out – web push notifications.
Chances are you know exactly push notifications are, even if you think you don’t. These bite-sized messages were introduced to mobile apps when they first rolled out as a method to drive users back to their apps. They are those messages you would get on your mobile phone saying it was someone’s birthday on Facebook or your turn on “Words With Friends”. Well, after much anticipation, these have now come to the web.
Did you know: Safari was among the first to introduce support for web push notications back in 2014. Chrome followed close behind, rolling out their support in 2015 and Firefox web push notifications are anticipated to release in Q1 2016.
So, what does that mean for you?
That means you now have an entirely new marketing channel to re-engage your website visitors. A new method that enables you to prompt website visitors to subscribe to your website without collecting any personal information. No more forms requiring email addresses or phone numbers. With web push notifications you simply provide the user with a simple “approve” or “deny” prompt and then you have them for life (well, or until they unsubscribe).
And these notifications are powerful. According to various sources, email marketing click through rates average 3%, while web push notifications average 20%. Not bad if you ask me!
So how do I get started?
In this post we are going to focus on getting started with web push notifications for those using WordPress via our WordPress push notification plugin. To help show you how easy it is, we’ve put together a short 3 minute video below which covers the entire installation process.
If you’d prefer to follow step by step written instructions, just skip past the video and follow the steps below.
Go ahead and jump into your WordPress admin (usually this is yourdomain.com/wp-login or yourdomain.com/wp-admin).
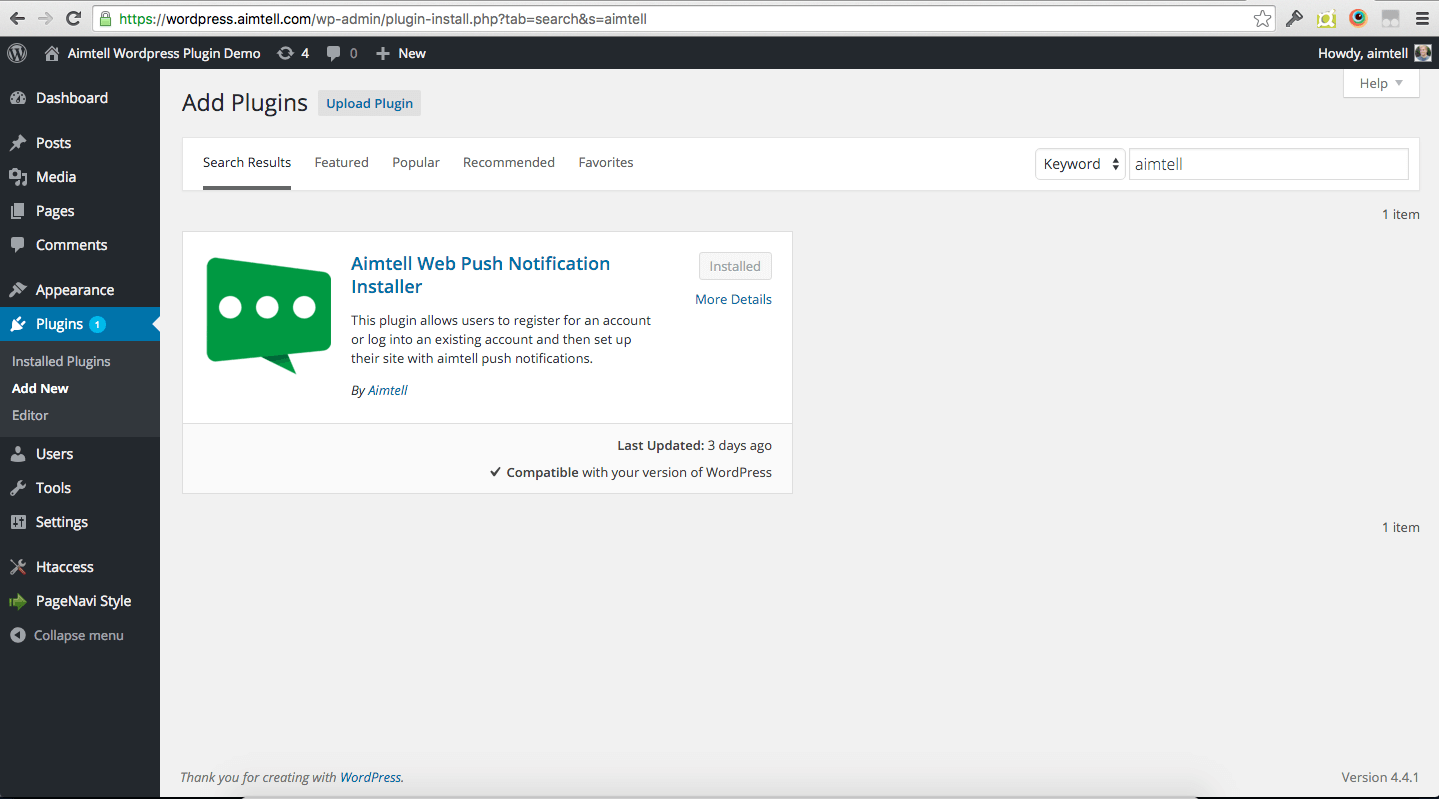
After you’ve logged in go to “Plugins” >> “Add New” and search for “Aimtell”. You should see the plugin on this page – just click install now. The plugin may take a few seconds to prepare and should reload once ready. At that point you should be able to click “activate now”.
After the plugin has been activated, click on “Aimtell Web Push” on the side navigation. You should be prompted with a login/register page.
If you already have an Aimtell account, go ahead and log in otherwise click the link that says new member signup.

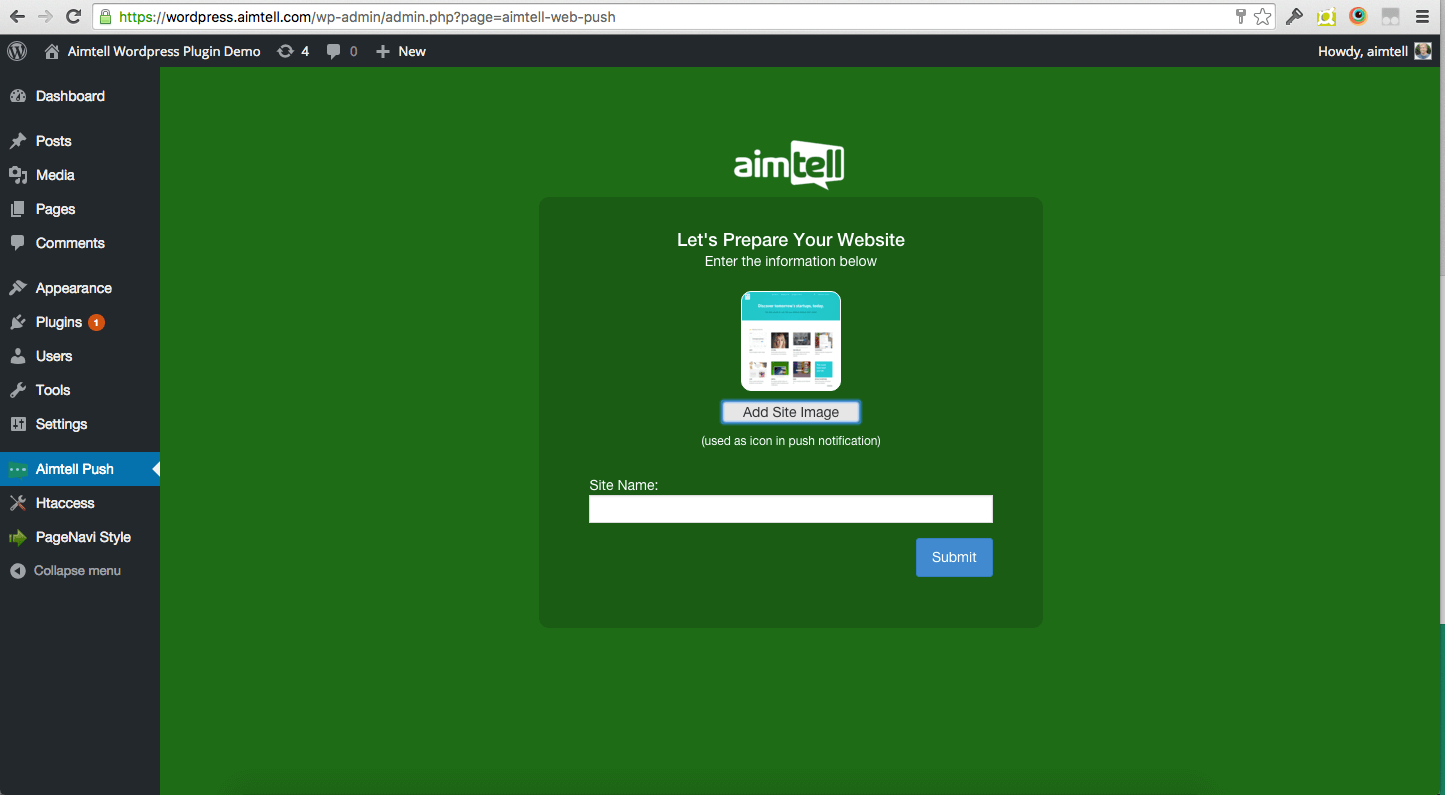
Once you’ve created you created your account you should see a page which asks you for an image and name. The image is the notification image that will be shown for all push messages you send. The name is the title of your website that will be shown to users when they receive the option to subscribe to your website.
Note: Chrome currently requires websites to be HTTPS in order to send push notifications. This is simply a security measure. If your website isn’t HTTPS – that’s ok, website visitors on Safari can still subscribe to your website. Once you enable HTTPS on your website users on chrome will receive a prompt as well.
After filling out the desired website name and push notification image, hit submit. The system will automatically register an account for you, add your website to your account and then install the required files on your website. It should take only a few seconds.
Once your site is finished being created you should get a page that says installation complete with a link to your dashboard. We will get back to that in just a second, but you can now check your website and see your new push notification permission prompt. Safari and Chrome look a little different, but it should look something like:

The dashboard is your new control center for seeing how many subscribers you have and sending new notifications. You can access it via the link in wordpress or directly by going to https://dashboard.aimtell.com
The dashboard is also where you can manage which pages should prompt users to subscribe to your website. By default, the prompt shows for all new users on all pages. If you want to edit which pages it shows on, log into your dashboard and go to “Websites” >> “View Websites” >> “Edit” >> “Prompt Management”.

Overtime you will notice your subscriber count increasing with new individuals that you can send notifications to. Remember, the beauty of these web push notifications is that they can be delivered to your subscribers regardless if they are on your website and can be even delivered if they don’t have their internet browser open!
P.S. Don’t forget to sign up to our newsletter to receive tips & tricks on how to maximize your new push notification subscriber database!