We’ve got some pretty exciting updates to share with you all today! This latest round of features includes a new way to import custom attributes, additional location variables for more personalized campaigns, a new domain-level view that will come in handy for those of you who manage web push for multiple websites, and the ability to set your own custom worker scope! Let’s get right to it.
If you have subscriber data that you’ve already tracked, there is now an easy way to import it into Aimtell! Whether you have information from a CRM such as Hubspot, or if you are importing your subscribers from another web push provider, you can import these custom attributes easily into Aimtell via an excel file in order to sync with your current Aimtell subscribers based on their subscriber ID or alias.
You can then use these custom attributes to add some personalization into your notifications or for advanced segmentation purposes.
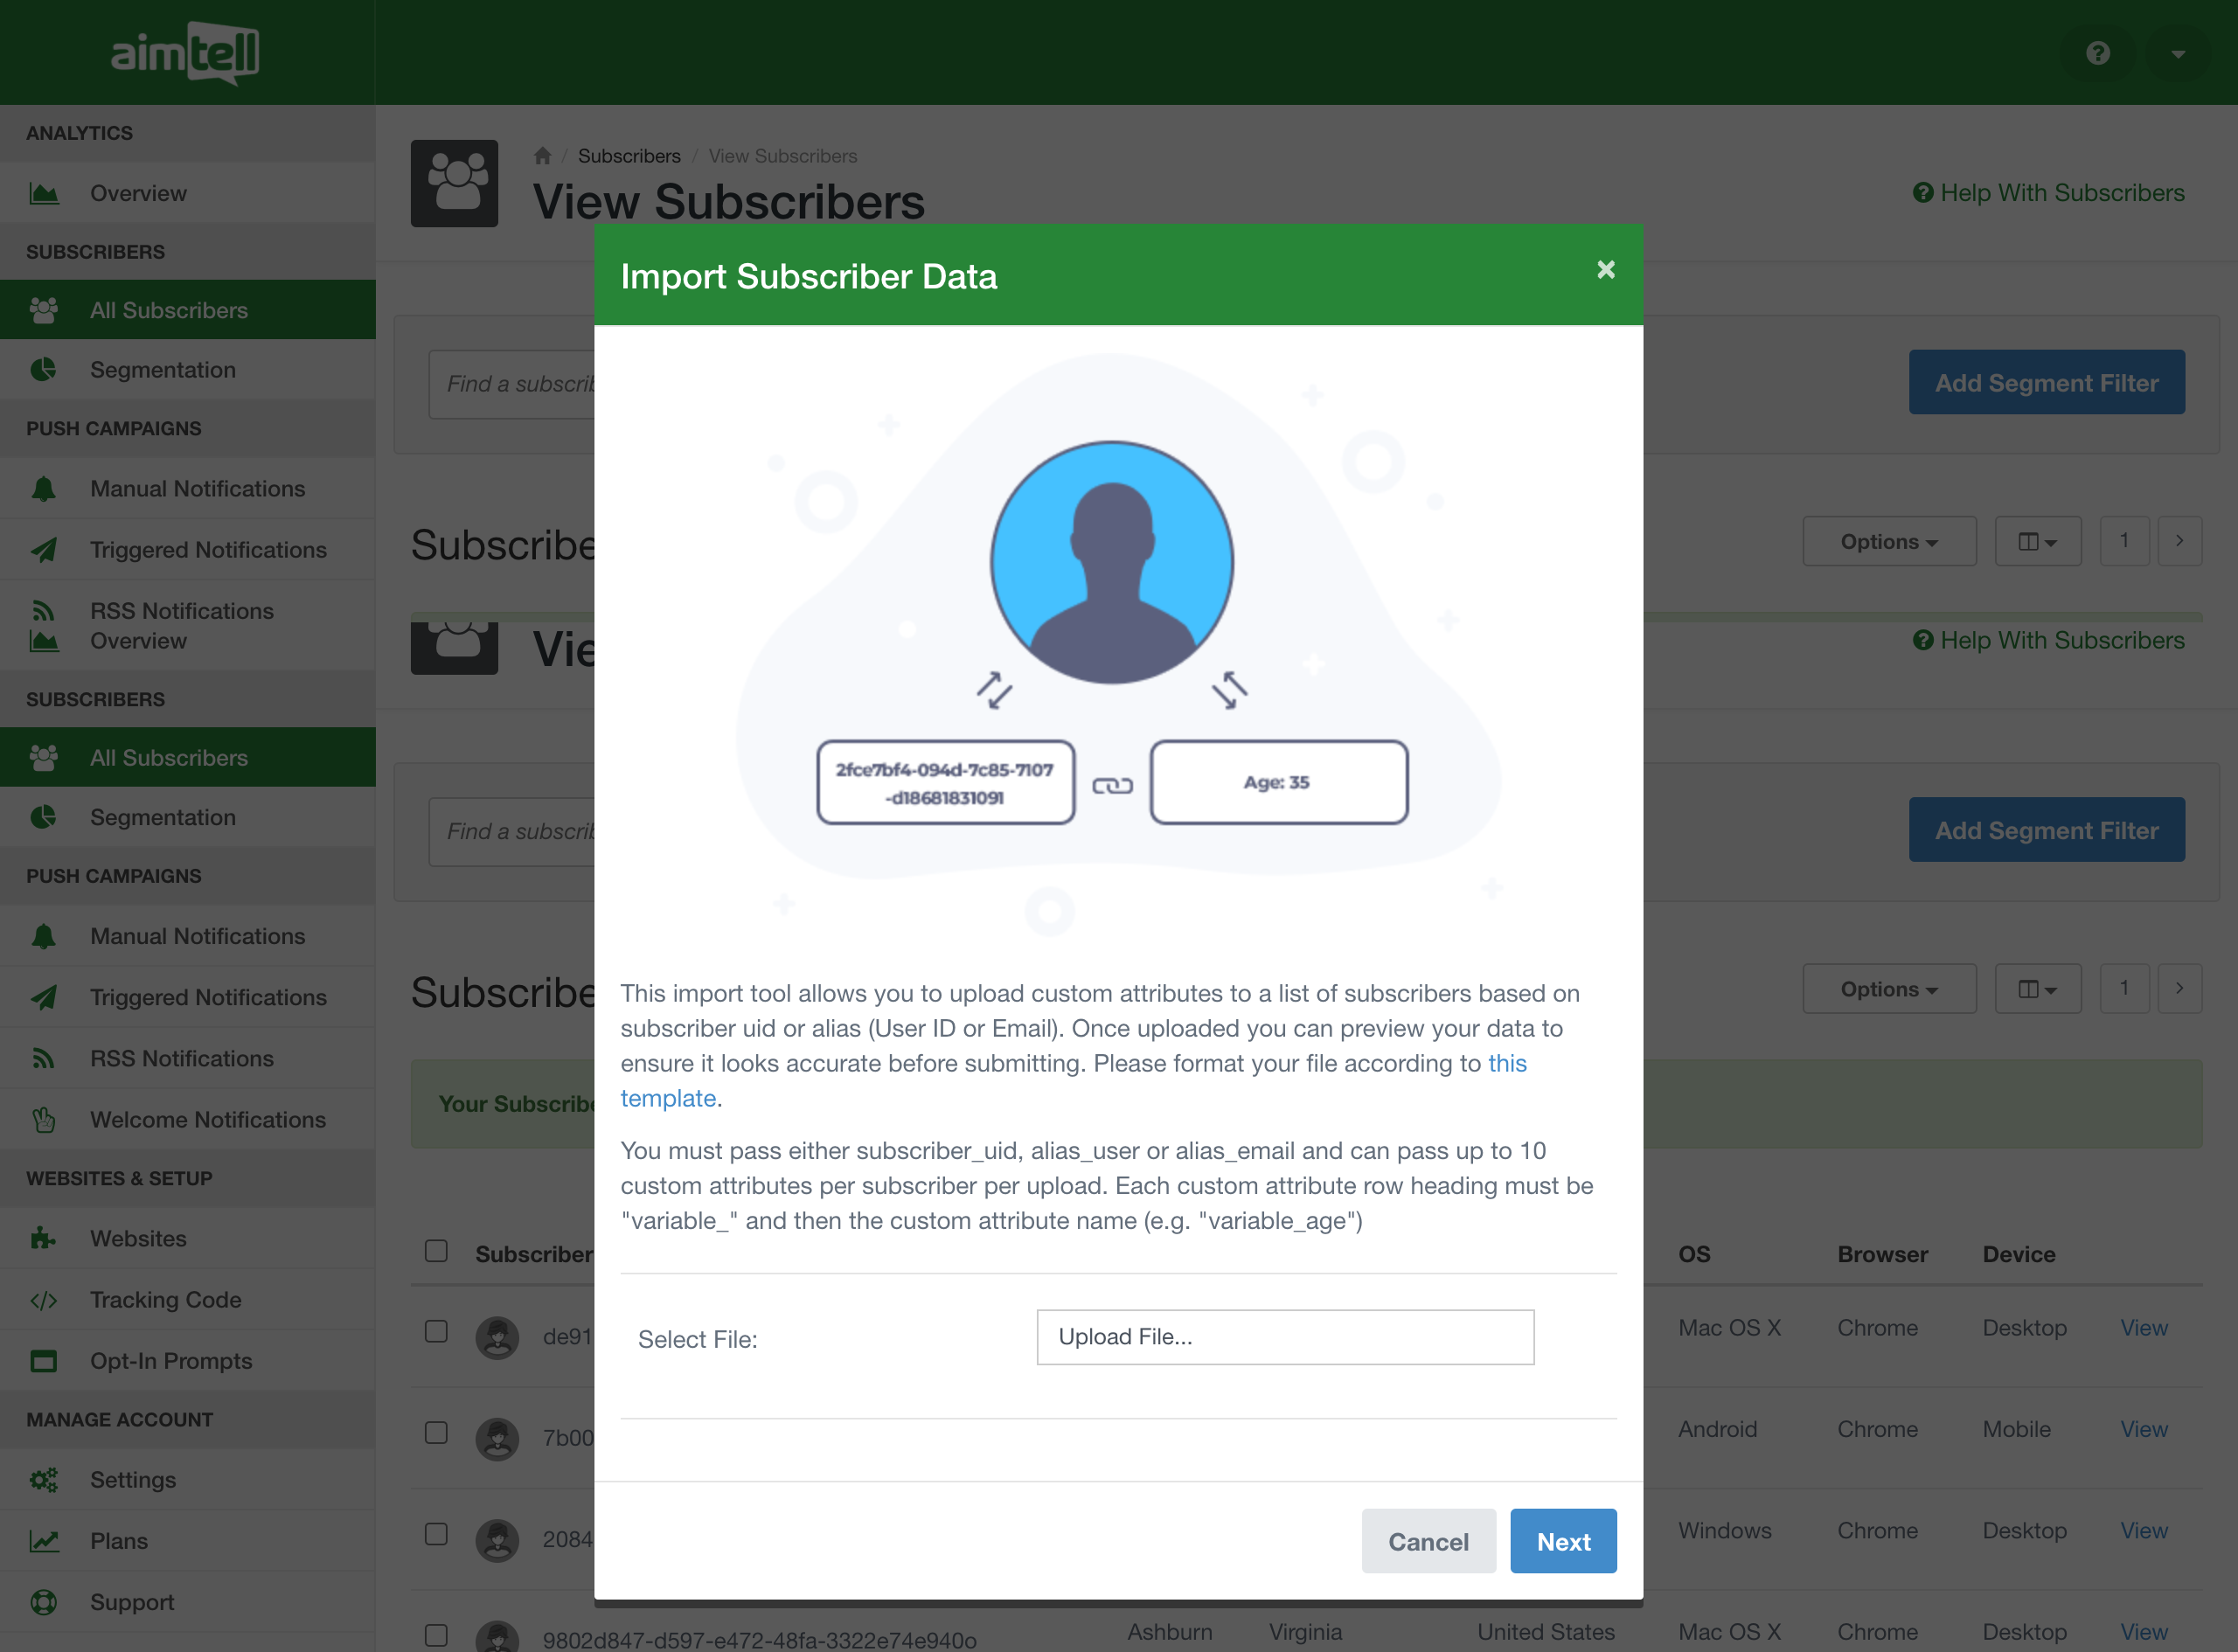
To do so, head to your dashboard and navigate to ‘All Subscribers.’ Then, from the Options drop-down menu select ‘Import.’ You will be prompted to upload your file, and once done, you can preview it before fully submitting it. This is a great way to quickly add custom attributes that you can then use for more personalized notifications, as well as for advanced segmentation.
Be sure to follow the instructions exactly so that your import will work successfully. We provide you with a template that we highly recommend you use so that your file is appropriately formatted.
Once finished, you can navigate to ‘Imports’ from the dashboard to see a list of your imports and information about them, including if there were any errors.
For help setting this up, check out our importing custom attributes documentation.
Variables are a great way to add some personalization to your web push campaigns. We’ve added some new location-based generic variables that you can use anywhere in your campaigns. Here is a list of all the new variables available:

To add one of these variables into a campaign, simply hit the curly bracket { select the one you wish to use and hit ‘insert.’ That’s it! Head to our generic variables documentation to view the full list of generic variables available for you to use.
If you manage a lot of websites, you will love this latest feature! Our new website level view allows you to see a quick snapshot of your web push performance across all of your websites. Head to ‘Websites’ from the dashboard to see the new view.
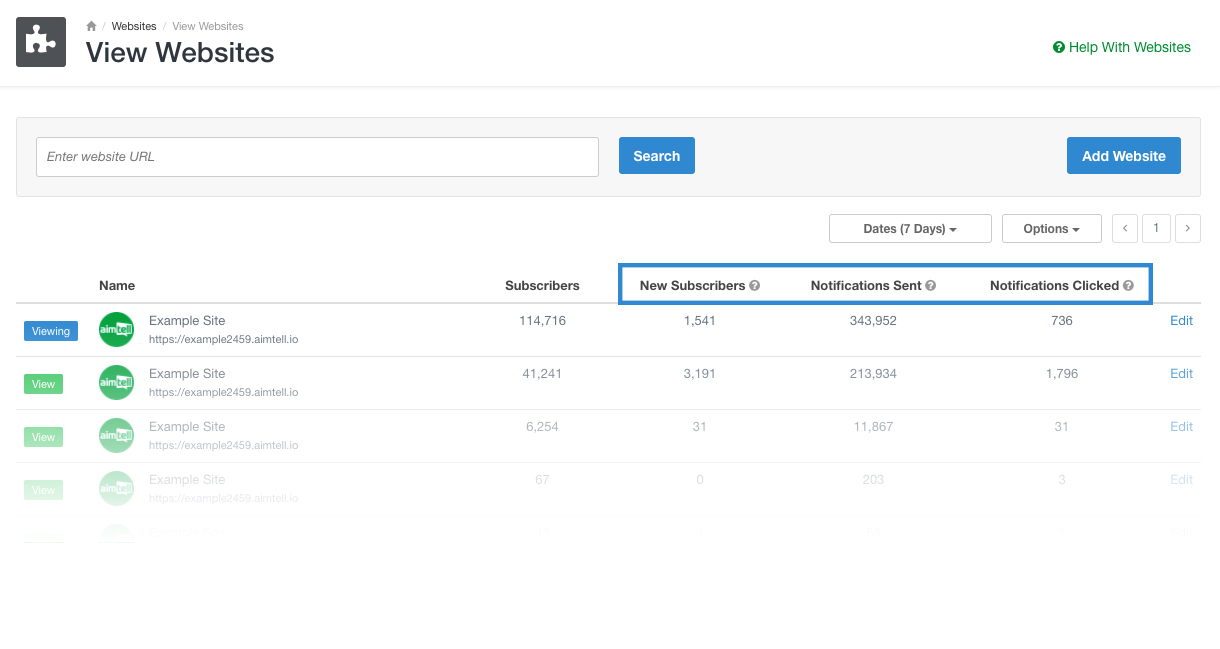
There are three new columns that will show you new subscribers, notifications sent, and notifications clicked. The default range for these stats is 7 days, however, you can also select a custom range if you prefer. From the ‘Dates (7 Days)’ menu select ‘Custom Range’ and then choose the custom range that you want. Learn more in our viewing your websites documentation.
This is a great way to easily see (and sort) your websites based on how they are performing. You can also easily export this data as a CSV file (Options > Download) so that it can be shared.
Whether you have just a handful of websites or a larger list, we think this website view will come in handy and save you a lot of time. Instead of pulling reports from each website and comparing performance, you can now easily do so from one location to see which sites are performing best and which might need some work!
Finally, we’ve got one more update that the majority of you do not need to worry about. We’ve added the ability for you to apply a custom worker scope to the service worker which determines which files the service worker controls, or in other words, from which path the service worker will intercept requests. This really only applies to users who don’t have access to upload the service worker to their root folder and allows you to upload it in a sub-folder instead. If you use a platform like Squarespace or Wix you may run into this issue.
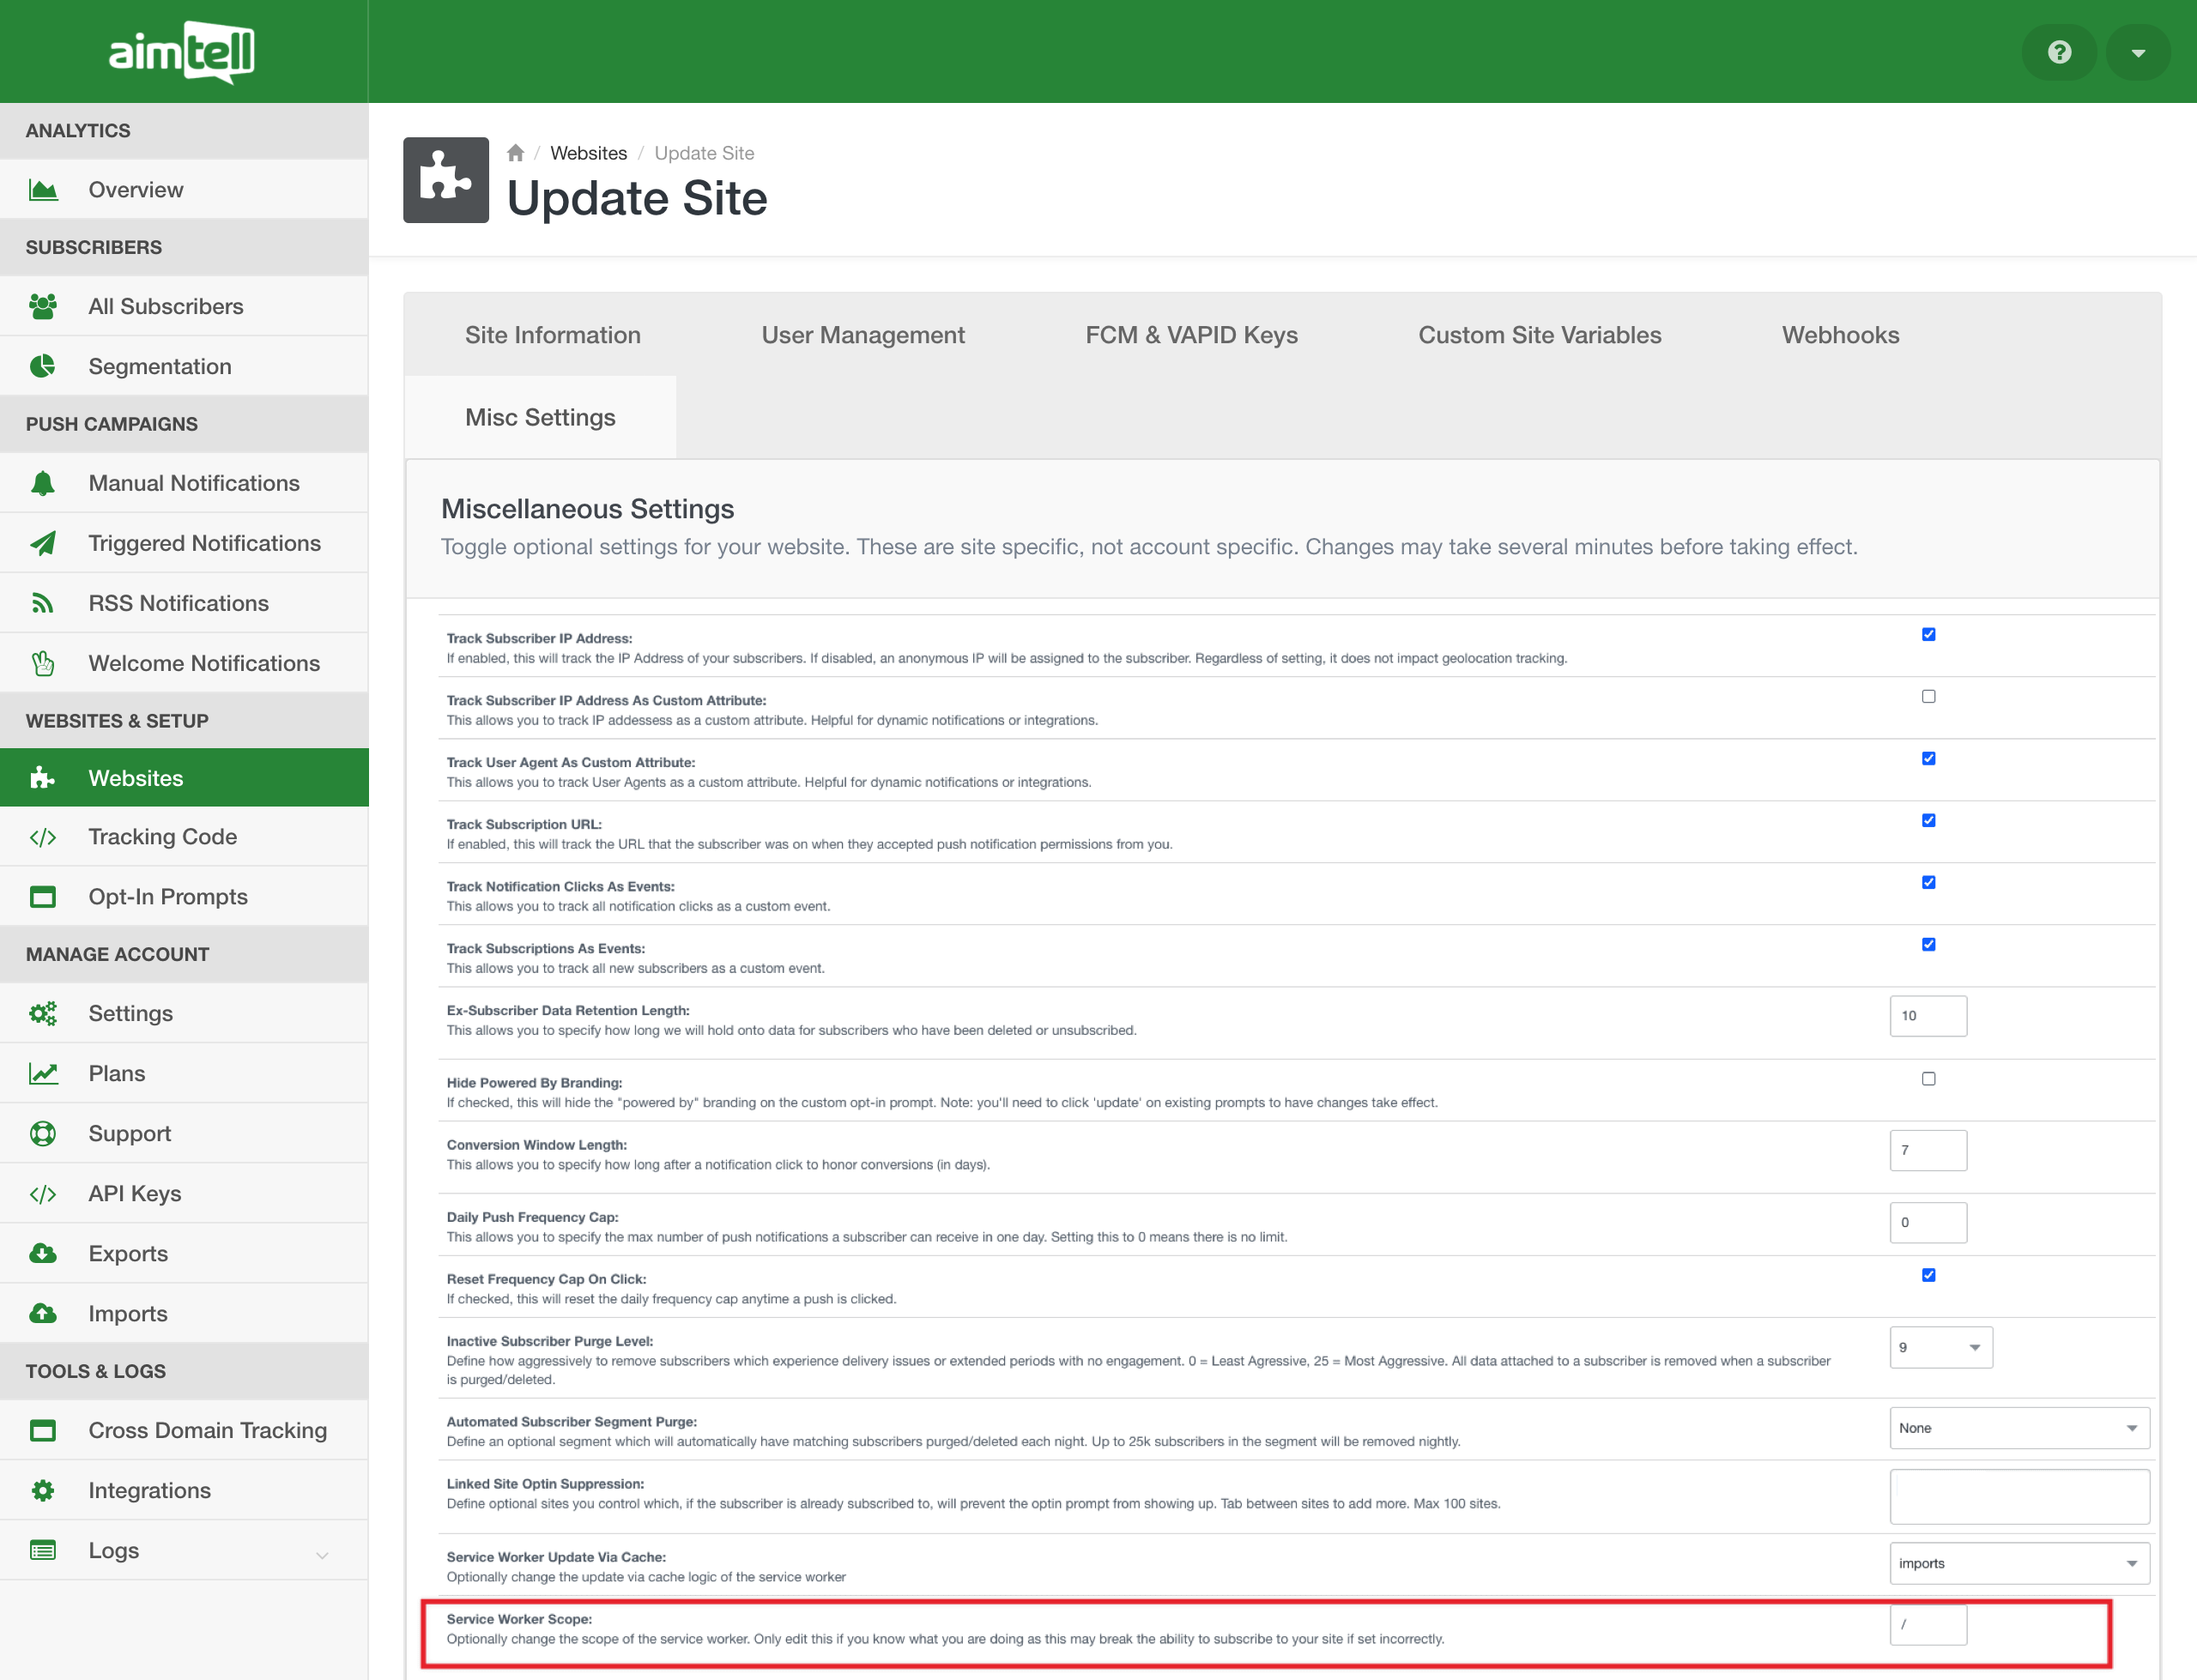
To do this, head to ‘Websites’ from the dashboard and hit edit next to the website you would like to adjust. Select ‘Misc Settings’ and scroll to the bottom of the list to find this option. Make sure you only alter this value if you are absolutely sure what you are doing otherwise you might cause your opt-ins to break and notice a sharp decline in your number of new subscribers.
All of these new features are available now in our dashboard so be sure to check them out! If you have any questions, please feel free to reach out to us and we will be happy to answer any questions. We hope that these latest updates will power you to create even more personalized campaigns that yield you even better results. If you manage multiple websites, our new websites view should help save you a lot of time.
Have an idea for a new feature you’d like to see? We always love receiving your feedback so be sure to let us know! We are always listening to what you all have to say. For those of you who are new to web push and want to get started, you can start your free trial with Aimtell or learn more about web push by reading our Beginner’s Guide.